> ## Documentation Index
> Fetch the complete documentation index at: https://hoopdev-feat-new-runbook-parameters.mintlify.site/llms.txt
> Use this file to discover all available pages before exploring further.
# OneLogin (SAML 2.0)
## Requirements
* An [account in OneLogin](https://www.onelogin.com/)
* `API_URL` is the public DNS name of the hoop gateway instance
Contact the administrator of the hoop gateway instance to retrieve the `API_URL` address.
## Identity Provider Configuration
Create a new application
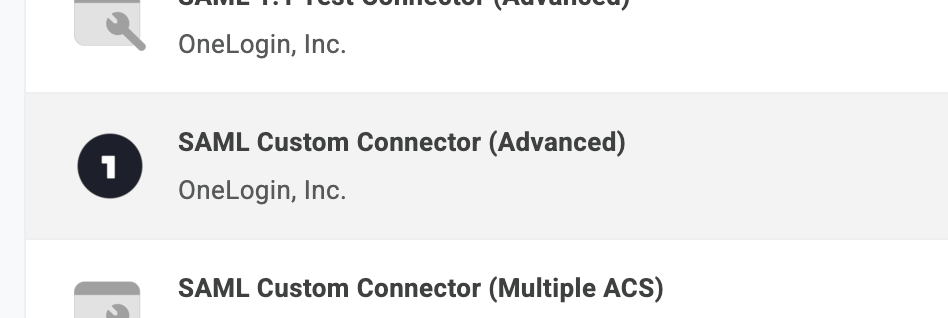
* Go to **Applications** and click on the **Add App** button
* Search for `saml`
* Select **"SAML Custom Connector (Advanced)"**
* Add a display name and click on Save
 * Click on **Users** in the **left sidebar**
* Confirm your user is allowed to login
If your is not included by default, make sure to add manually through the **Users** menu.
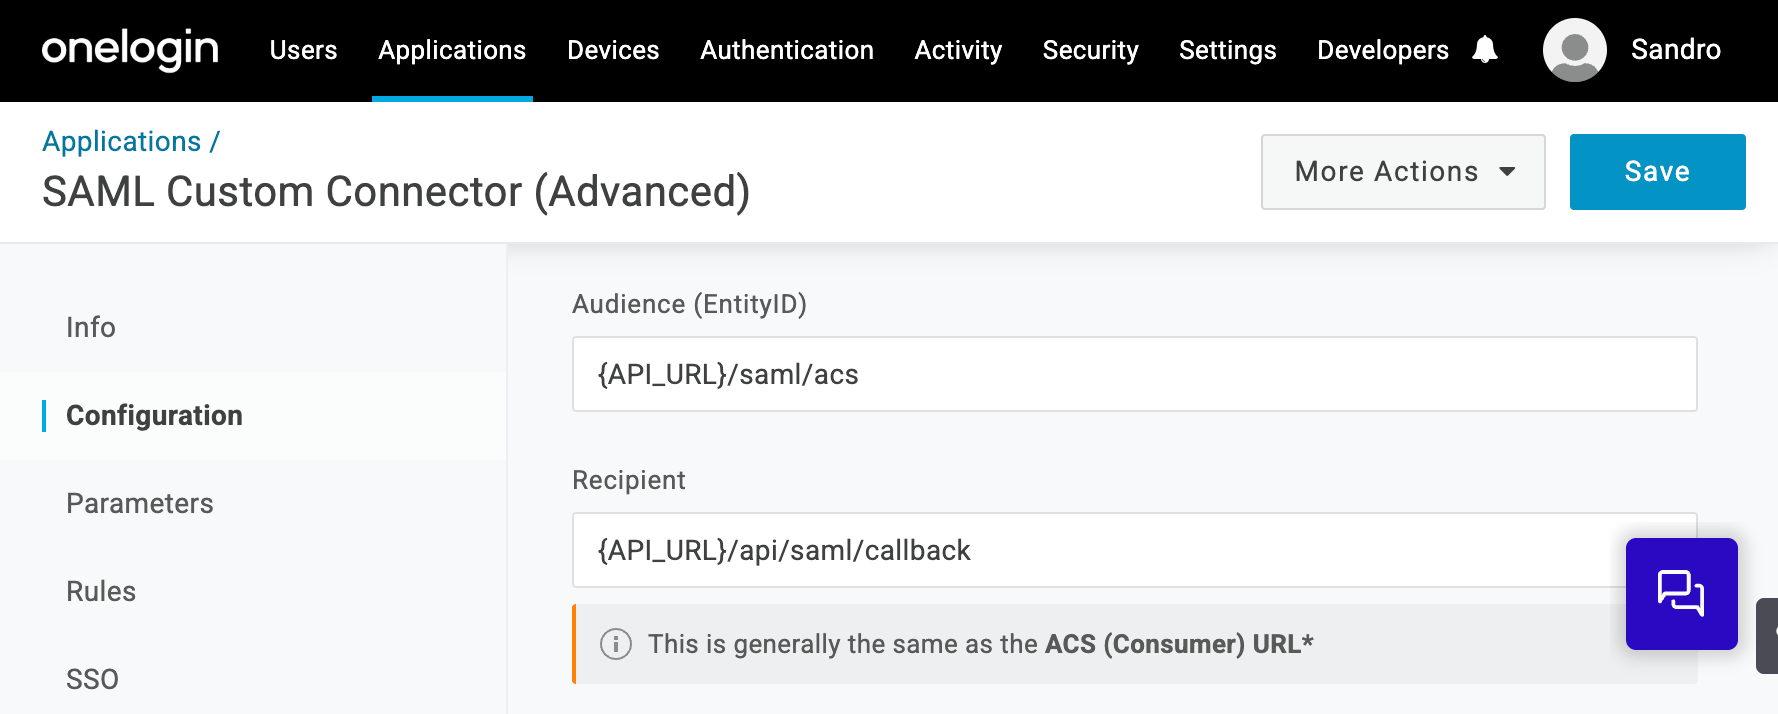
* Navigate to **Configuration** in the **left sidebar**
* In `Audience (EntityID)` add the value `{API_URL}/saml/acs`
* In `Recipient` add the value `{API_URL}/api/saml/callback`
* Click on **Save** to persist the changes
Leave all other fields with default values.
* Click on **Users** in the **left sidebar**
* Confirm your user is allowed to login
If your is not included by default, make sure to add manually through the **Users** menu.
* Navigate to **Configuration** in the **left sidebar**
* In `Audience (EntityID)` add the value `{API_URL}/saml/acs`
* In `Recipient` add the value `{API_URL}/api/saml/callback`
* Click on **Save** to persist the changes
Leave all other fields with default values.
 * Go to **SSO** in the **left sidebar** and copy the **issuer URL**
**Example:** `https://app.onelogin.com/saml/metadata/`
## Parameters Configuration
To propagate the Display name of users and synchronize with Hoop, make sure to add the following parameters:
* Field Name: `first_name`, Value: `First Name`
* Field Name: `last_name`, Value: `Last Name`
* Go to **SSO** in the **left sidebar** and copy the **issuer URL**
**Example:** `https://app.onelogin.com/saml/metadata/`
## Parameters Configuration
To propagate the Display name of users and synchronize with Hoop, make sure to add the following parameters:
* Field Name: `first_name`, Value: `First Name`
* Field Name: `last_name`, Value: `Last Name`
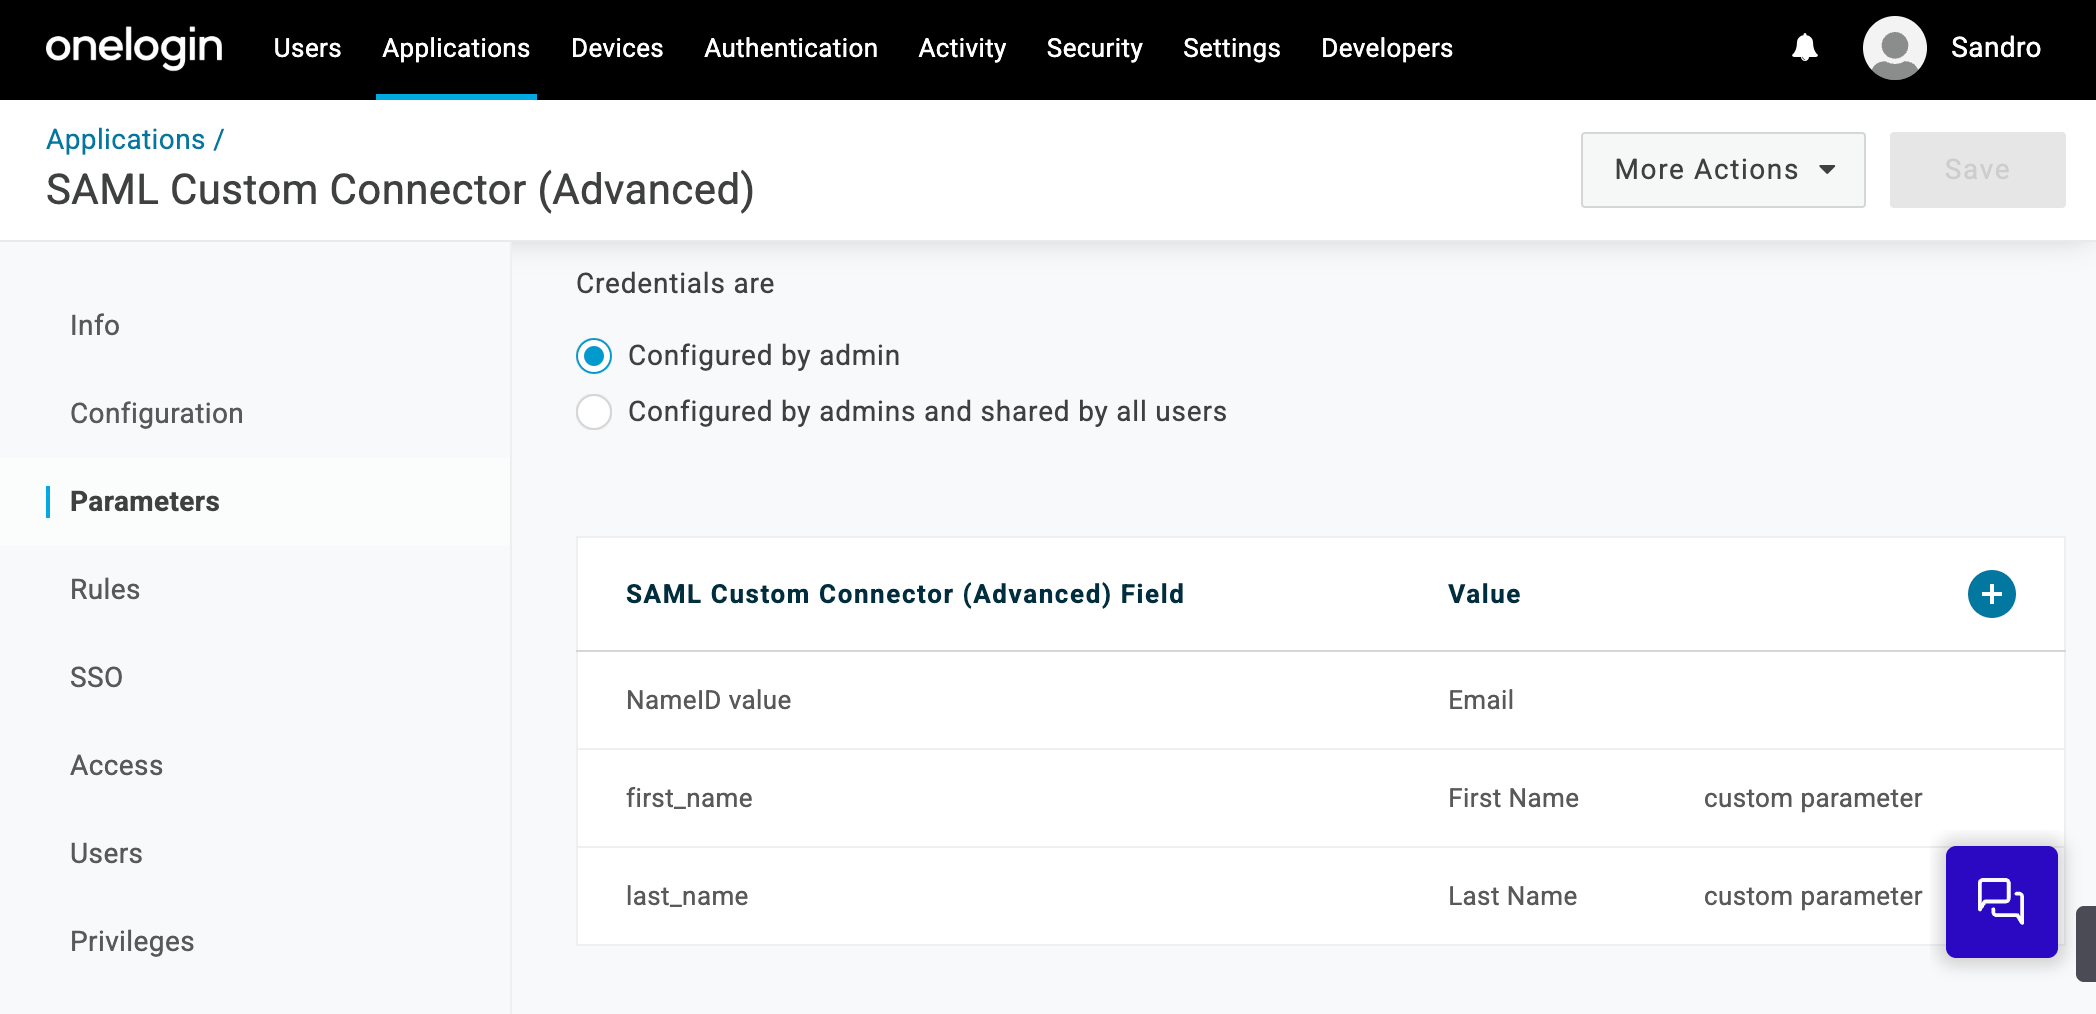 After a user sign in, the display name will be updated accordingly.
## Groups Configuration
To propagate group to Hoop via SAML is creating User Roles and propagating as SAML assertions values.
1. Go to **Users** > **Roles**
2. Click on **New Role**
3. Add the name of your group and click on **Save**
After a user sign in, the display name will be updated accordingly.
## Groups Configuration
To propagate group to Hoop via SAML is creating User Roles and propagating as SAML assertions values.
1. Go to **Users** > **Roles**
2. Click on **New Role**
3. Add the name of your group and click on **Save**
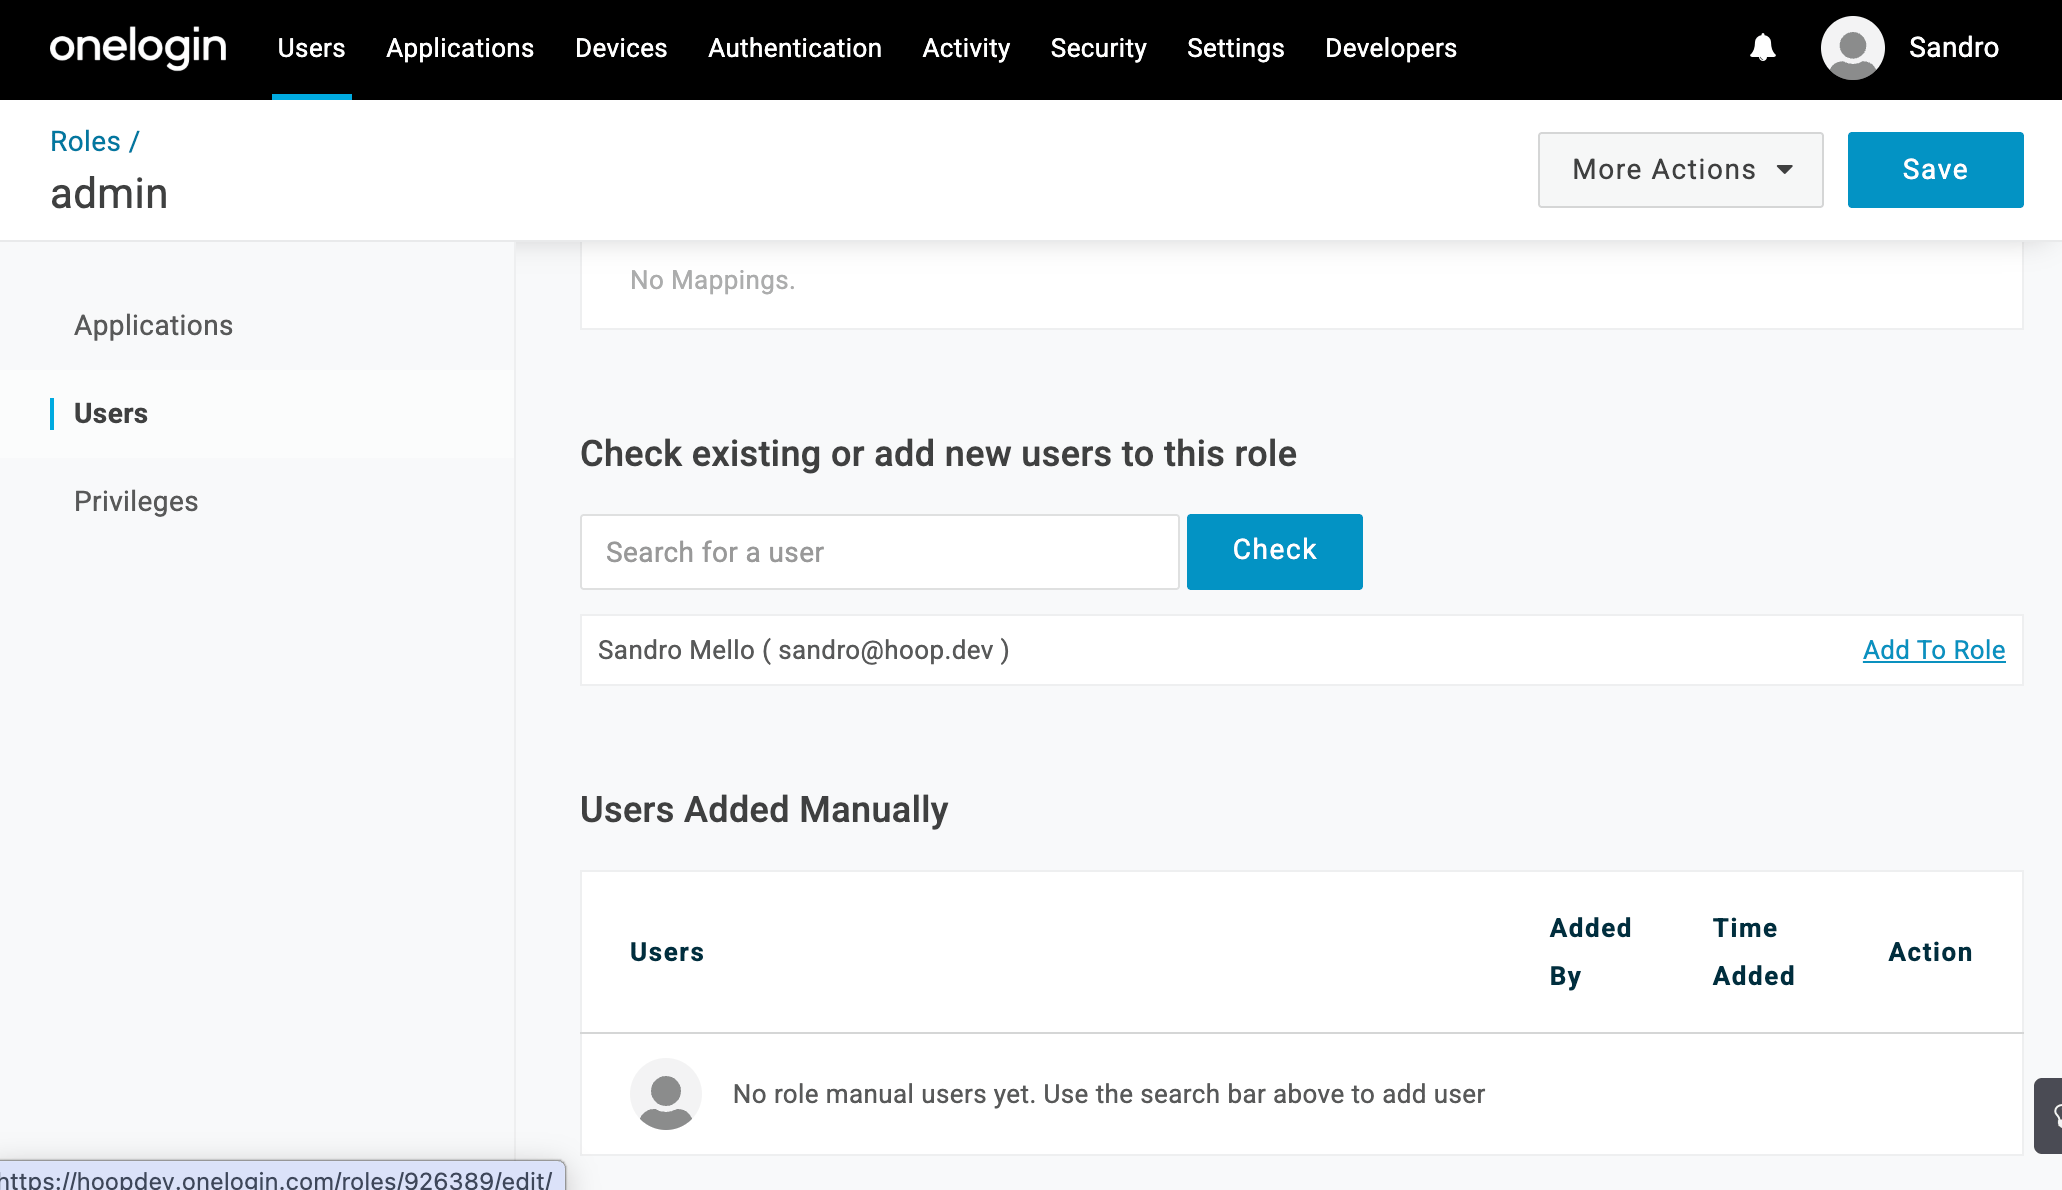
 * Return to **Users** > **Roles**
* Select the created role
* Click in Users in the left side bar
* Add the email on the input "Check existing or add new users to this role"
* Click in "Add to Role" and then Save
* Return to **Users** > **Roles**
* Select the created role
* Click in Users in the left side bar
* Add the email on the input "Check existing or add new users to this role"
* Click in "Add to Role" and then Save
 You could create a mapping to add users automatically to this role.
* Go to **Applications** > **Your App** > **Parameters**
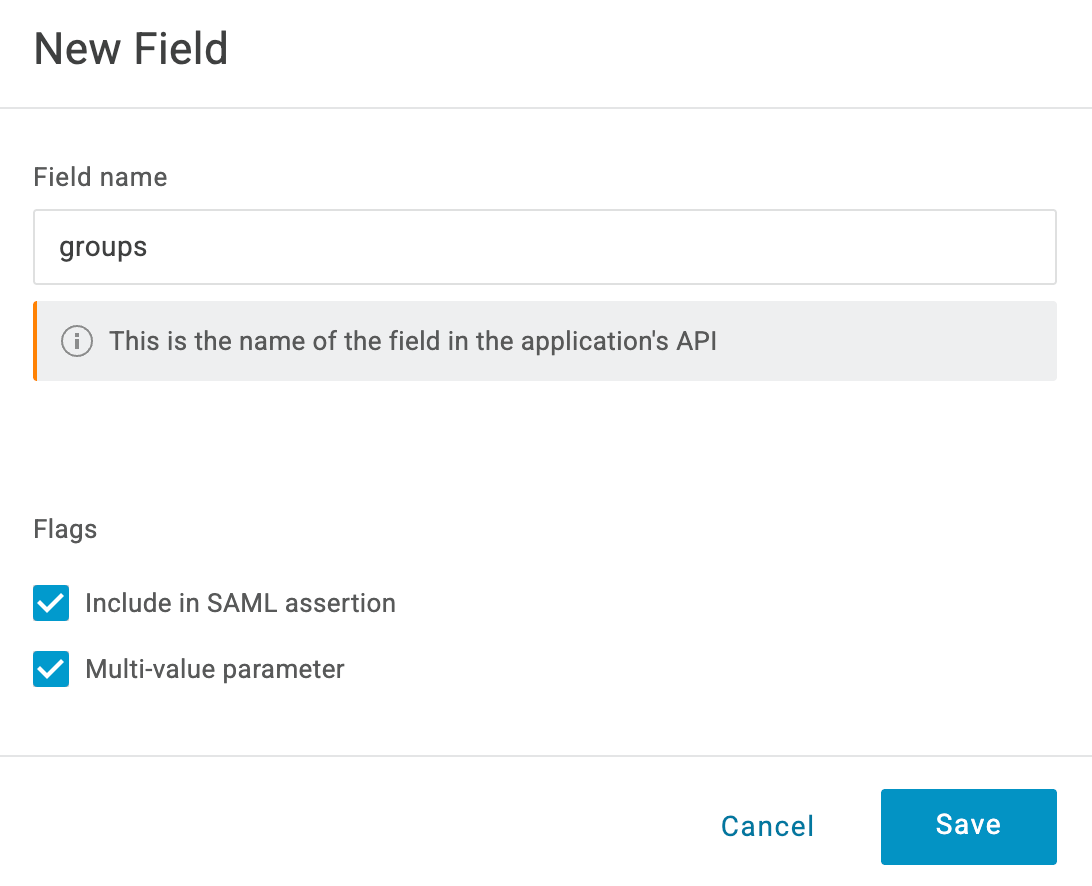
* Add a new field with the name `groups`
* Select the checkbox "Include SAML assertion" and "Multi-value parameter"
* Click on Save
You could create a mapping to add users automatically to this role.
* Go to **Applications** > **Your App** > **Parameters**
* Add a new field with the name `groups`
* Select the checkbox "Include SAML assertion" and "Multi-value parameter"
* Click on Save
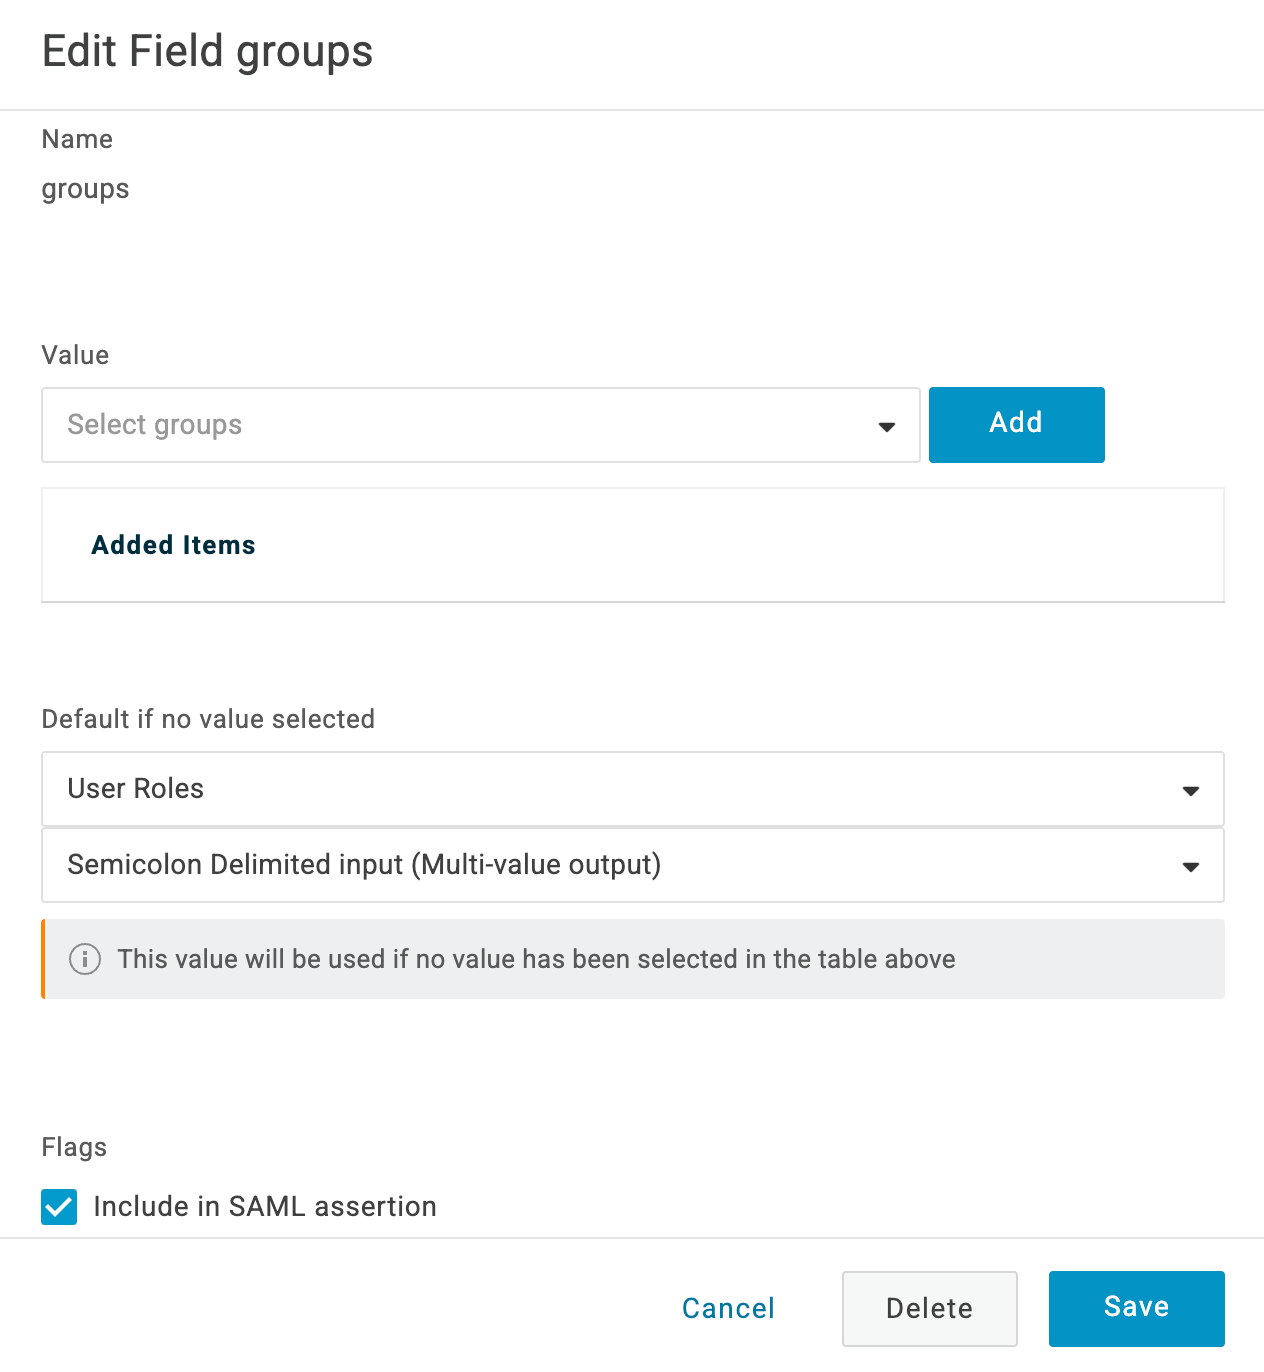
 * In the second dropdown field, select "User Roles"
* In the next one, select "Semicolon Delimited Input (Multi-value output)"
* Click on Save
* In the second dropdown field, select "User Roles"
* In the next one, select "Semicolon Delimited Input (Multi-value output)"
* Click on Save
 Perform the logout on your Hoop instance and the new group will be synchronized.
Fields from other integrations, such as Active Directory, can likely be propagated by following the same pattern, however this has not been officially validated yet.
Perform the logout on your Hoop instance and the new group will be synchronized.
Fields from other integrations, such as Active Directory, can likely be propagated by following the same pattern, however this has not been officially validated yet.